bk689 | 5 out of 5 Stars!
2017-08-20

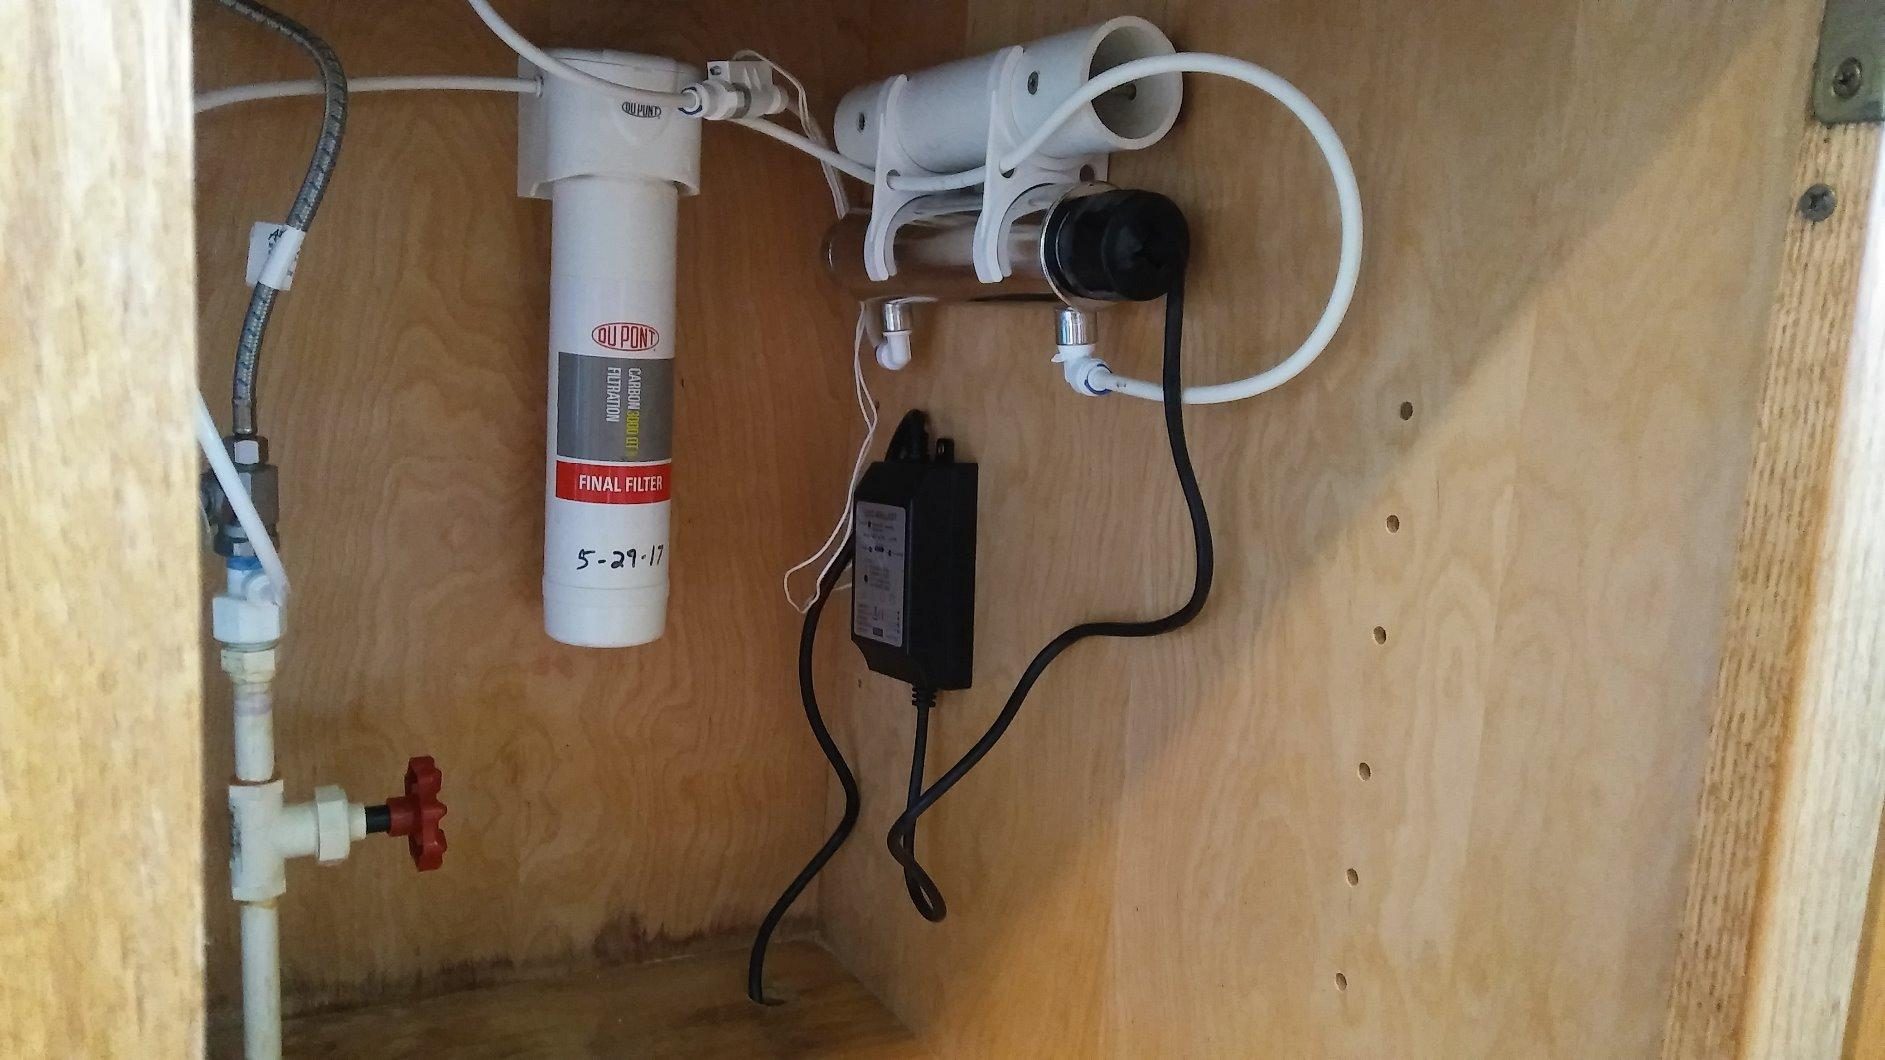
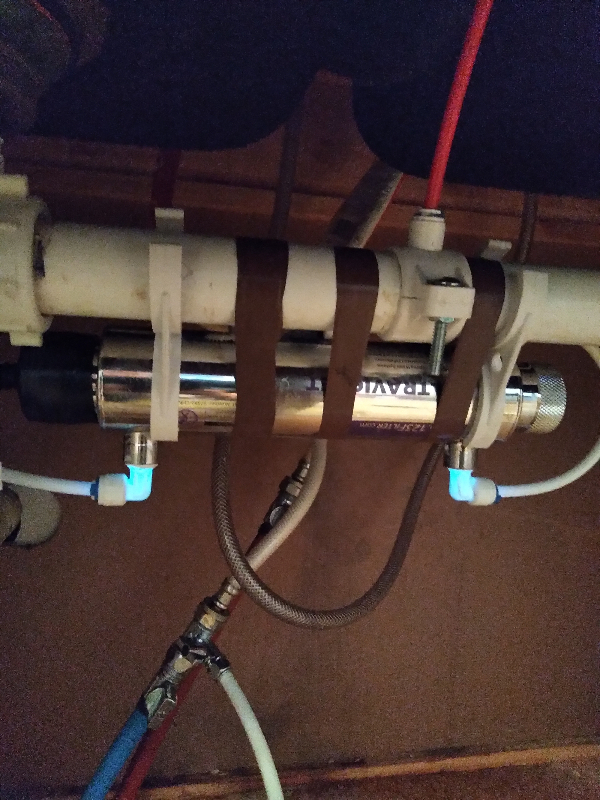
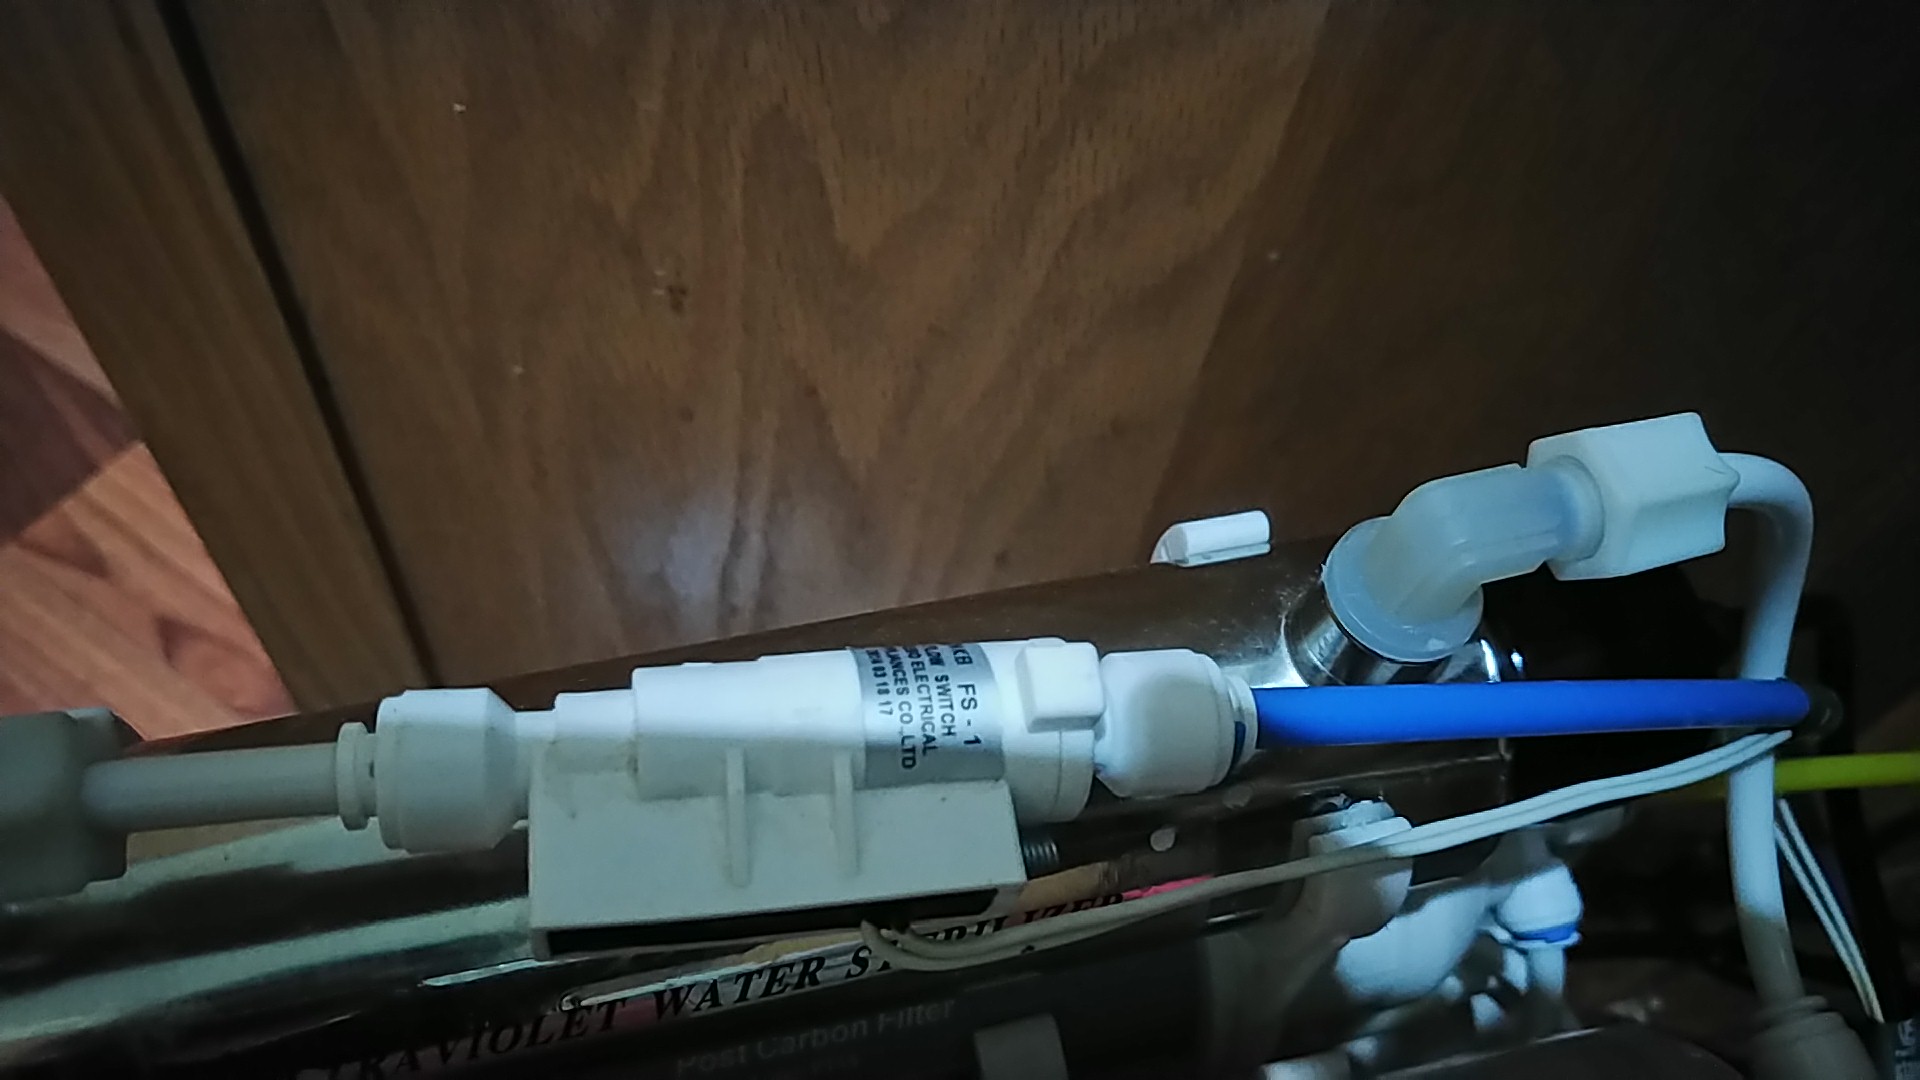
My bacteria count was 206 on a range of 0-250, and this was able to bring it down below the limit of 10. NICE!!! Take your time on installation. I already had a filter in line with my drinking water so that made it easier. I preferred the horizontal mounting so I had to cut a short section of PVC pipe (1.5" pipe, I think) and screw that inside the cupboard. Of course I placed a 1/4" piece of plywood in between the PVC and the cupboard wall so the mounting clip was able to snap all the way around the pipe.

36
Andy Blass | 5 out of 5 Stars!
2018-06-16

Just what I wanted, great product.
1
elpidio jr velasco | 5 out of 5 Stars!
2018-05-19

Excellent system, great water quality. The installation instructions were easy to follow.
1
B.R.Morris,Jr. | 4 out of 5 Stars!
2022-01-09

Installed after RO500, since I have well water. The blue light can be seen through the 90 degree elbows at the outlet and inlet when running. Instruction say have sensor before unit. One thing the instruction don't tell you, if mounting horizontally to have the fittings on top. I had the fittings on the bottom. After running a couple gallons I rolled filter 180 degrees and considerable amount of air came rushing out. I am glad I didn't damage or dirty up quartz tube. I plan on mounting vertically with intake on bottom, after making new bracket on 3-D printer

0
diy Lady | 5 out of 5 Stars!
2021-11-01

Love the installation and pictures. The only thing is, WHERE is the UV light supposed to turn on? I don't see it and the water flow is definitely there. I also have the arrow in the flow sensor going the correct direction.
0
diy lady | 3 out of 5 Stars!
2021-10-28

what kind of 1/4" tubing is needed?
0
Will Morar | 5 out of 5 Stars!
2020-03-05

The unit was easy to install. I used some 2 " central vac piping as an anchor to secure the clamps that came with unit. I was impressed with the flow switch operation. I am completely satisfied with the purchase and would recommend it to anyone looking to add UV disinfection to their RO system.

0
Biwater Inc | 5 out of 5 Stars!
2020-01-28

Great addition to a home-scale RO system.
0
pam smith | 5 out of 5 Stars!
2019-12-31

Were very pleased with this purchase! Along with the fact that the item arrived three days before the earliest projected delivery date, the actual assembly and installation of this iSpring UV system worked great.The instructions that come with the UV system are written expecting integration with a more sophisticated ballast. Our installation only uses the simple ballast supplied with this unit. If youre just going to be using the ballast with this unit, you can skip a bulk of the assembly steps outlined in the users manual.Most of trying to figure out how to assemble and install this unit required understanding how it works. At first, I thought perhaps I needed to undo the end of the unit where the black cap installs (see picture). I didnt understand that inside the unit, the glass chamber is already installed. Theres no need to disassemble anything! Just take out the UV lamp, open the bag with the green wire, and attach the wire connectors to either end of the lamp. Connect power and then press the black cap over the end of the assembly. This part of the installation is complete.This unit does not come with the 1/4" tubing. If you dont have any handy with your existing system, youll need to purchase it separately. The tube connectors are fantastic! Theres nothing to do to ensure a leak-free connection. Be sure you cut proper lengths first and do NOT expect to dry fit them! Once you press them in the fittings, they cannot be easily removed! I cut the proper lengths for our installation, pressed them between the flow control and the inlet, and then the other end of the flow control going to the water source. I then connected the faucet tube to the outlet. Once thats complete, youre done! Just mount the ballast, be sure the UV chamber is installed in a stable location, and then let the water flow!I experienced a very minor, slow leak at the elbow fittings. A simple twist to tighten them (theyre threaded into the stainless steel housing), and the leak was fixed.To ensure things are working, look at the right-angle fittings where the flow control is connected. When you turn the water on, youll hear a quiet "click" as the flow control initiates the ballast to turn the light on. Youll see the right-angle connector illuminate blue after the ballast clicks. When you turn the water off, the light goes off. Once you see the light go on and off with the water flow, you know youre installation was successful.I recommend writing on a Post-It note the date the UV light went into service and sticking it to the unit so youll know when you need to order a replacement lamp. The lamp youll need is a UVB11, and it should be replaced every 12 months.Ill explain a little bit about our installation, in case it might benefit others in a similar situation.Our installation replaced a much cheaper UV chamber attached to a three-stage filtration system. The unit we replaced was a plastic assembly with a 4W lamp that illuminated 24 hours a day. Because it was constantly on, it heated the water to a hot degree, which required us to turn the water on and wait a minute or so for the hot water to flow out. This was a waste of water and a waste of power! One tip: if you look on the Internet, youll see this unit selling for less. BE CAREFUL! This unit *is* sold for less, but without the flow control device. I strongly recommend purchasing this unit with the flow control, as shown on Amazon. Without the flow control, your UV lamp will illuminate 24 hours a day, like our old unit did. This iSpring UV system is an 11W system that blasts the water with a more powerful dose of UV light. Once you turn your water on, it disinfects more efficiently than many other cheaper units. The unit we replaced had a proprietary light and wire harness the company wanted $100 to replace each year. This was a ridiculous price! The iSpring unit youre looking at now allows for *you* to replace just the light itself, painlessly, for far, far less money (about $35 or less, at the time of this writing)!We highly recommend this unit. If we run into any problems with it, Ill post an update here. If you see no update, then you can be sure its still functioning properly.
0
Kaley Simon | 5 out of 5 Stars!
2019-12-04

It was very simple, easy and quick to install. It is built very strong and of high quality. iSpring seems to never fail when it comes to quality products.
0