
|
|


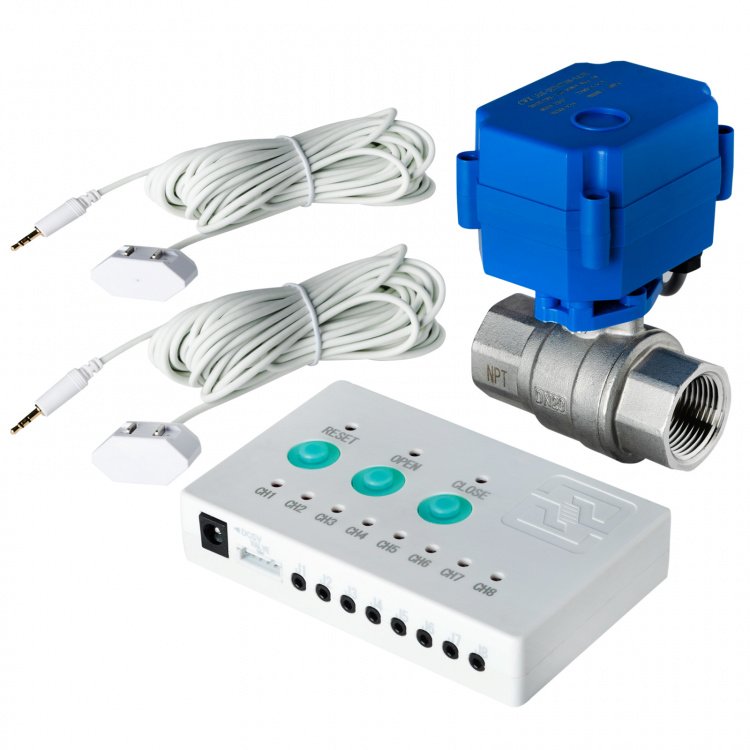
iSpring LS43 Water Leak Detector Alarm System with Automatic Shut-off Valve and 2 Detection Sensors, Connects Up to 8 Sensor to Prevent Flooding
About this item
- iSpring water leak detection system is designed and to be installed on whole house water pipe to detect and set alarm for possible leak and shut off water supply automatically to prevent flooding
- Includes 2 water sensors. The controller unit is able to connect up to 8 water detection sensors
- Includes a 3/4” NPT automatic shut-off ball valve
- Requires a power outlet for the controller unit
- 1-year warranty with lifetime support from iSpring
Share


Frequently Bought Together
iSpring LS43 Water Leak Detector Alarm System with Automatic Shut-off Valve and 2 Detection Sensors, Connects Up to 8 Sensor to Prevent Flooding

-
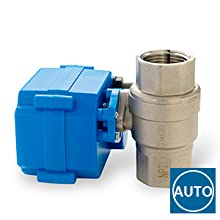
Automatic Shut-Off
The leak-detecting sensor that automatically turns off the valve once water is detected helps prevent major flooding and water damage.
-

Quick and loud alarm
Sounds an alarm immediately to warn people in the house to check. It can be turned off quickly with the RESET button.


-
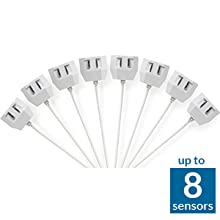
Connect up to 8 sensors
This controller unit can connect up to 8 water detection sensors, allowing you to cover the whole water pipe area in the house.
-
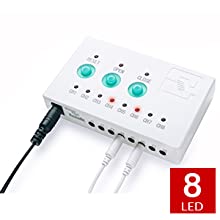
Easy-operated Controller
8 LED lights indicating which sensor has detected water. Three buttons give you different choices to interact freely with the controller.


What’s included
- Ball valve with sound/light alarm
- Controller module
- 5V / 1A Transformer
- 2 pieces of water sensors

Step1: Install the ball valve to the pipe.
To install the ball valve, shut off the main water supply line, turn on a faucet on the water supply line, drain out the remaining water and air in the pipe. Locate the ball valve's position to be installed, use a pipe cutter to cut the sides of the pipe. Put the ball valve into the spliced pipe. Please note that sweat joints/plumber's cement(not included) may be needed to secure the installation. Depending on the type of the pipes, couplers(not included) may also be required to close the installation.
Step2: Mount the control module on the wall.
The control module should be mounted at a location close to the application that is vulnerable to water leakage, and a power outlet is required.

Step3: Make sure the location is damp.
Place and spread the sensors on the ground. Up to 8 sensors are supported. For best performance, drop the sensors at places close to the wall and which may have direct contact with water in case of a leak incident.

Step4:
Plug the power cable, valve cable, and sensor cables into the ports on the control module.
- Availability: In Stock
- Model: LS43
- Manufacturer: iSpring
- Product Dimensions: 8.50"L x 10.75"W x 3.50"H
- Product Weight: 2.00 LB
Reviews with images
Write Review
-
Start Download
LS43 Manual
How to install
Warranty Registration & Help Center


Tell us about your shopping experience


